
Available to purchase from Polymart or Spigot
¶ Features
- 1.8, 1.9, 1.10, 1.11, 1.12, 1.13, 1.14, 1.15, 1.16, 1.17, 1.18, 1.19, 1.20, and 1.21 support
- Highly configurable
- Create your own tiers
- Create your own clues
- Create custom trigger clues to trigger from other plugins
- Fully configured default configuration and rewards are provided
- Reward system to give items and execute command rewards
- 250+ unique clue types!
- Full message customization
- Trigger fireworks and particle effects
- Developer scrolls API
- Developer event API
- Vault integration
- Cooldowns for scroll purchases
- Customizable purchase and rewards inventories
- Purchase scrolls for experience, money, or other currencies
- Crosses out completed clues
- Option to show only one clue at a time
- Specify the number of clues put onto a generated scroll
- Specify the number of rewards a scroll will receive with ranges
- Make scrolls glow
- Title bar and chat notifications
- Command tab auto-complete
- Ability to not duplicate clues on a scroll
- Ability to not duplicate rewards given from a scroll
- Tier specific rewards
- Weights determine how common a reward is
- Automatically updates files when you download a new version
- WorldGuard, Towny, Votifier, ASkyBlock, ChatReaction, AutoSell, Vault, Boss, and MythicMobs integration.
¶ Commands
Aliases: [cluescrolls, cluescroll]
- /cluescrolls - Open shop inventory
- /cluescrolls shop - Open shop inventory
- /cluescrolls help - Help
- /cluescrolls give - Give a scroll to a player
- /cluescrolls giveall - Give a scroll to everyone online
- /cluescrolls reload - Reload all config files
- /cluescrolls rehook - Rehook the plugin
- /cluescrolls additem - Add an item as a reward
- /cluescrolls addcommand - Add a command as a reward
- /cluescrolls removereward - Remove a reward
- /cluescrolls listrewards - List rewards
- /cluescrolls rewardinfo - Display info about a reward
- /cluescrolls getreward - Used to get a reward for debug purposes
- /cluescrolls editor - Open the editor GUI
- /cluescrolls resetcooldown - Reset cooldowns of specific identifiers or players. Useful for testing.
- /cluescrolls customtrigger - Trigger an event for a customtrigger clue
- /cluescrolls debug monitor [player] - Display debug info with clue data
¶ Permissions
- cluescrolls.* -- Gives access to all plugin features
- cluescrolls.command.* -- Gives access to all commands
- cluescrolls.command.help.user -- Gives access to the /cluescroll help for user related commands
- cluescrolls.command.help.admin -- Gives access to the /cluescroll help for admin related commands
- cluescrolls.command.give -- Gives access to
/cluescroll give - cluescrolls.command.give.others -- Gives access to
/cluescroll give [PlayerName] - cluescrolls.command.givecrystal -- Gives access to
/cluescroll givecrystal - cluescrolls.command.givecrystal.others -- Gives access to
/cluescroll givecrystal [PlayerName] - cluescrolls.command.giveall -- Gives access to
/cluescroll giveall - cluescrolls.command.reload -- Gives access to
/cluescroll reload - cluescrolls.command.rehook -- Gives access to
/cluescroll rehook - cluescrolls.command.additem -- Gives access to
/cluescroll additem - cluescrolls.command.addcommand -- Gives access to
/cluescroll addcommand - cluescrolls.command.removereward -- Gives access to
/cluescroll removereward - cluescrolls.command.listrewards -- Gives access to
/cluescroll listrewards - cluescrolls.command.rewardinfo -- Gives access to
/cluescroll rewardinfo - cluescrolls.command.getreward -- Gives access to
/cluescroll getreward - cluescrolls.command.editor -- Gives access to
/cluescroll editor - cluescrolls.command.resetcooldown -- Gives access to
/cluescroll resetcooldown - cluescrolls.command.customtrigger -- Gives access to
/cluescroll customtrigger - cluescrolls.command.shop -- Gives access to
/cluescroll shop - cluescrolls.command.chest -- Gives access to
/cluescroll chest - cluescrolls.command.debug -- Gives access to
/cluescroll debug - cluescrolls.checkforupdates -- Alerts the player when updates to the plugin are available
¶ How to Install
Installing Clue Scrolls is easy as can be. Follow the few steps below and you'll be all set.
- Purchase and download the ClueScrolls.jar.
- Upload the ClueScrolls.jar into your plugins folder.
- (Optional) - If you wish to use any features which involves the exchange of money, you will need vault. You can download and follow the instructions found here.
- Start/restart/reload your server. Default configuration files will automatically be generated at this point in your plugins/ClueScrolls/ directory.
- Read about the configuration files, clue creation, and adding rewards found below to configure the plugin exactly to your liking.
- Have fun! Feel free to PM or post to the discussion any issues you experience or recommendations you have for features.
¶ Configuration Files
When the plugin loads for the files time, default configration files will automatically load. Use these files as a reference with their comments explaining parts of the configs. When you update cluescrolls, if there were any changes to the config, your current config will auotmiatcally backup in your ClueScrolls/backups directory and will automatically update to the newer format. Any missing messages in the messages file are added if missing.
Hex colors are supported. Use the format <#RRGGBB>
config.yml [1.8.x-1.12.x]
config.yml [1.13.x]
config.yml [1.14.x-1.15.x]
config.yml [1.16.x+]
rewards.yml [1.8.4+]
messages.yml [All versions]
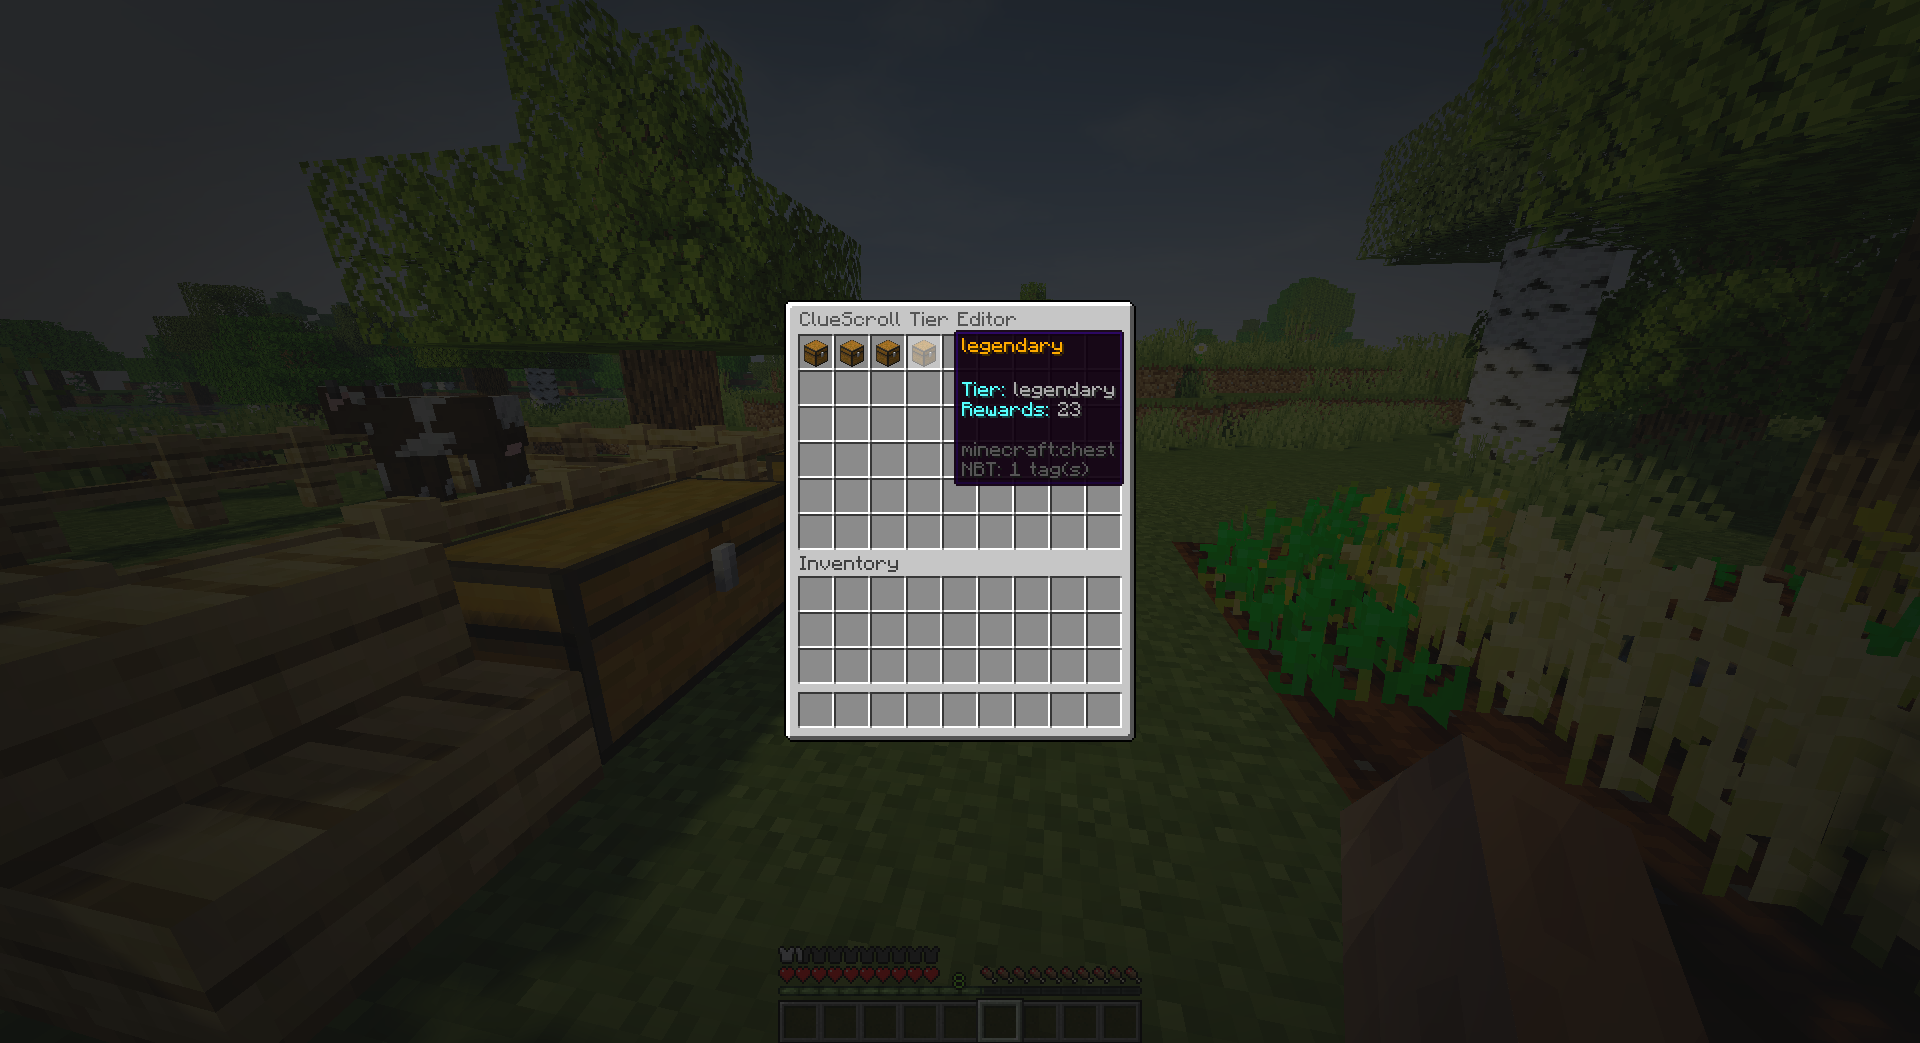
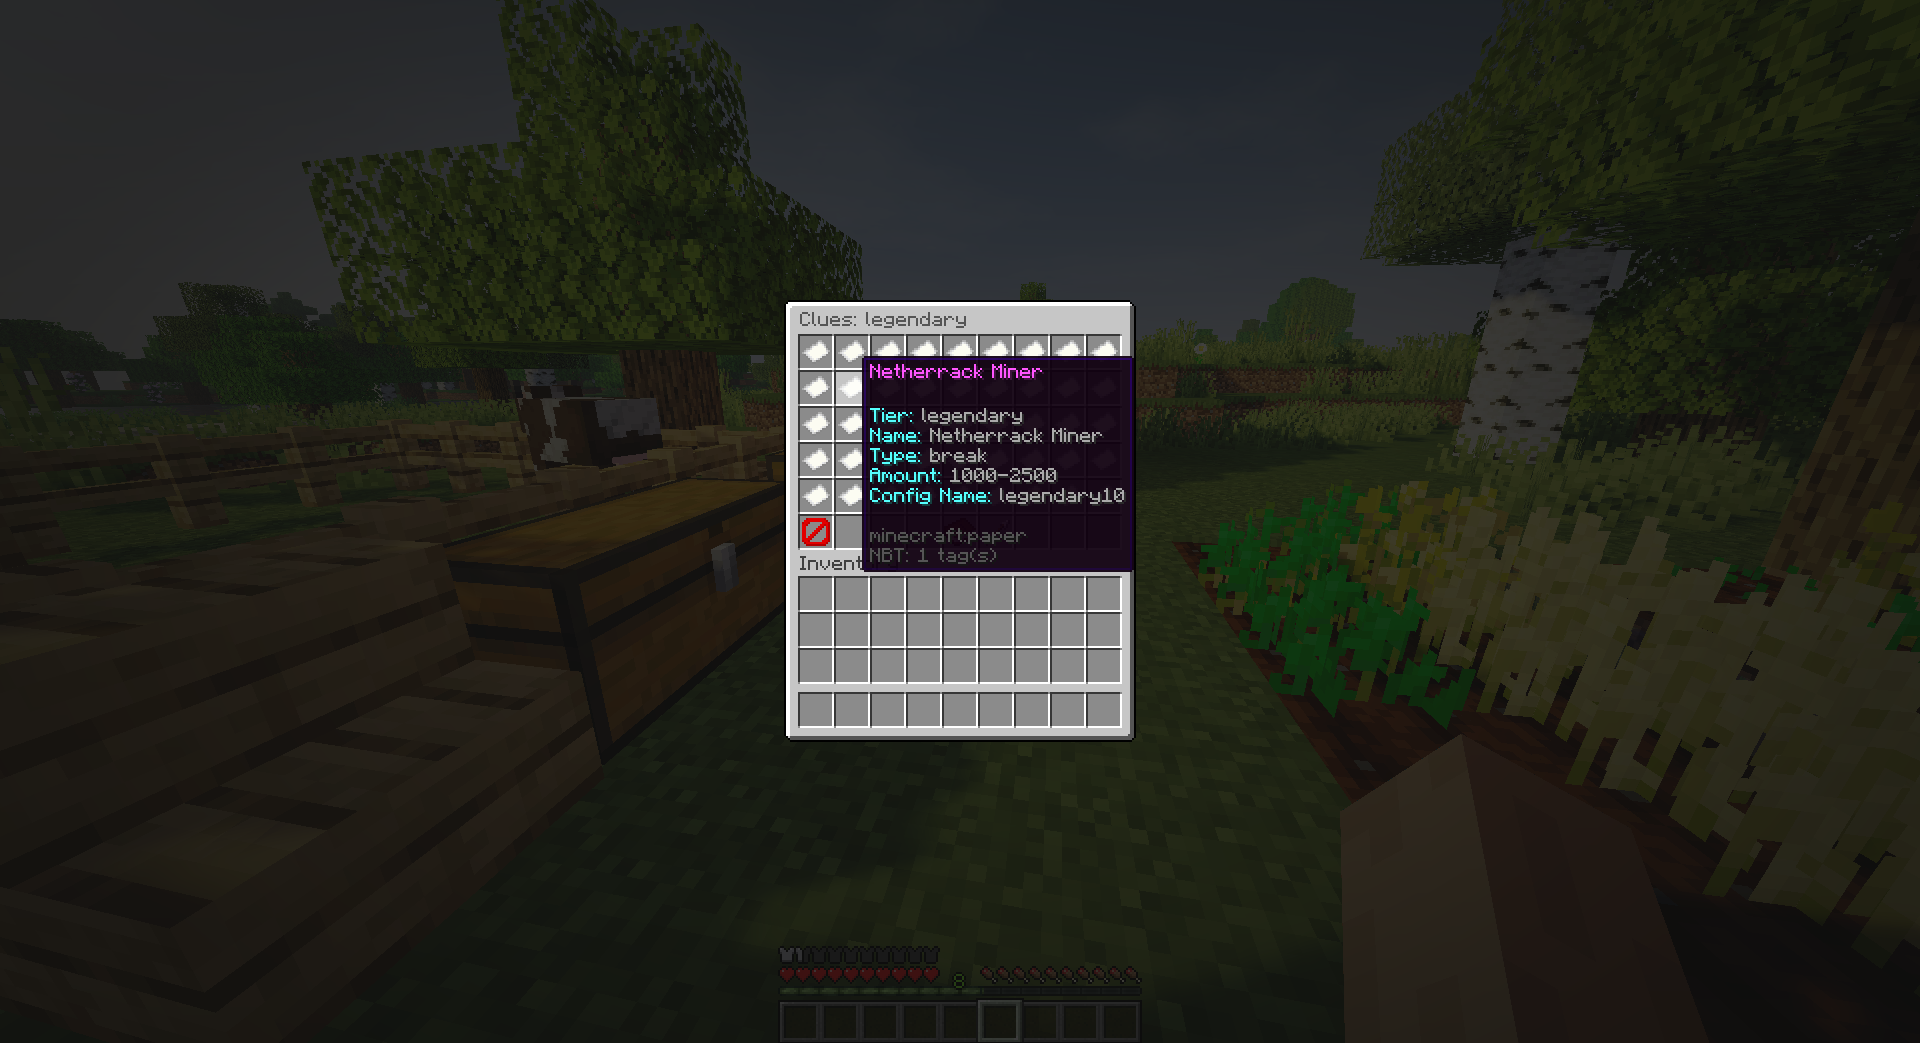
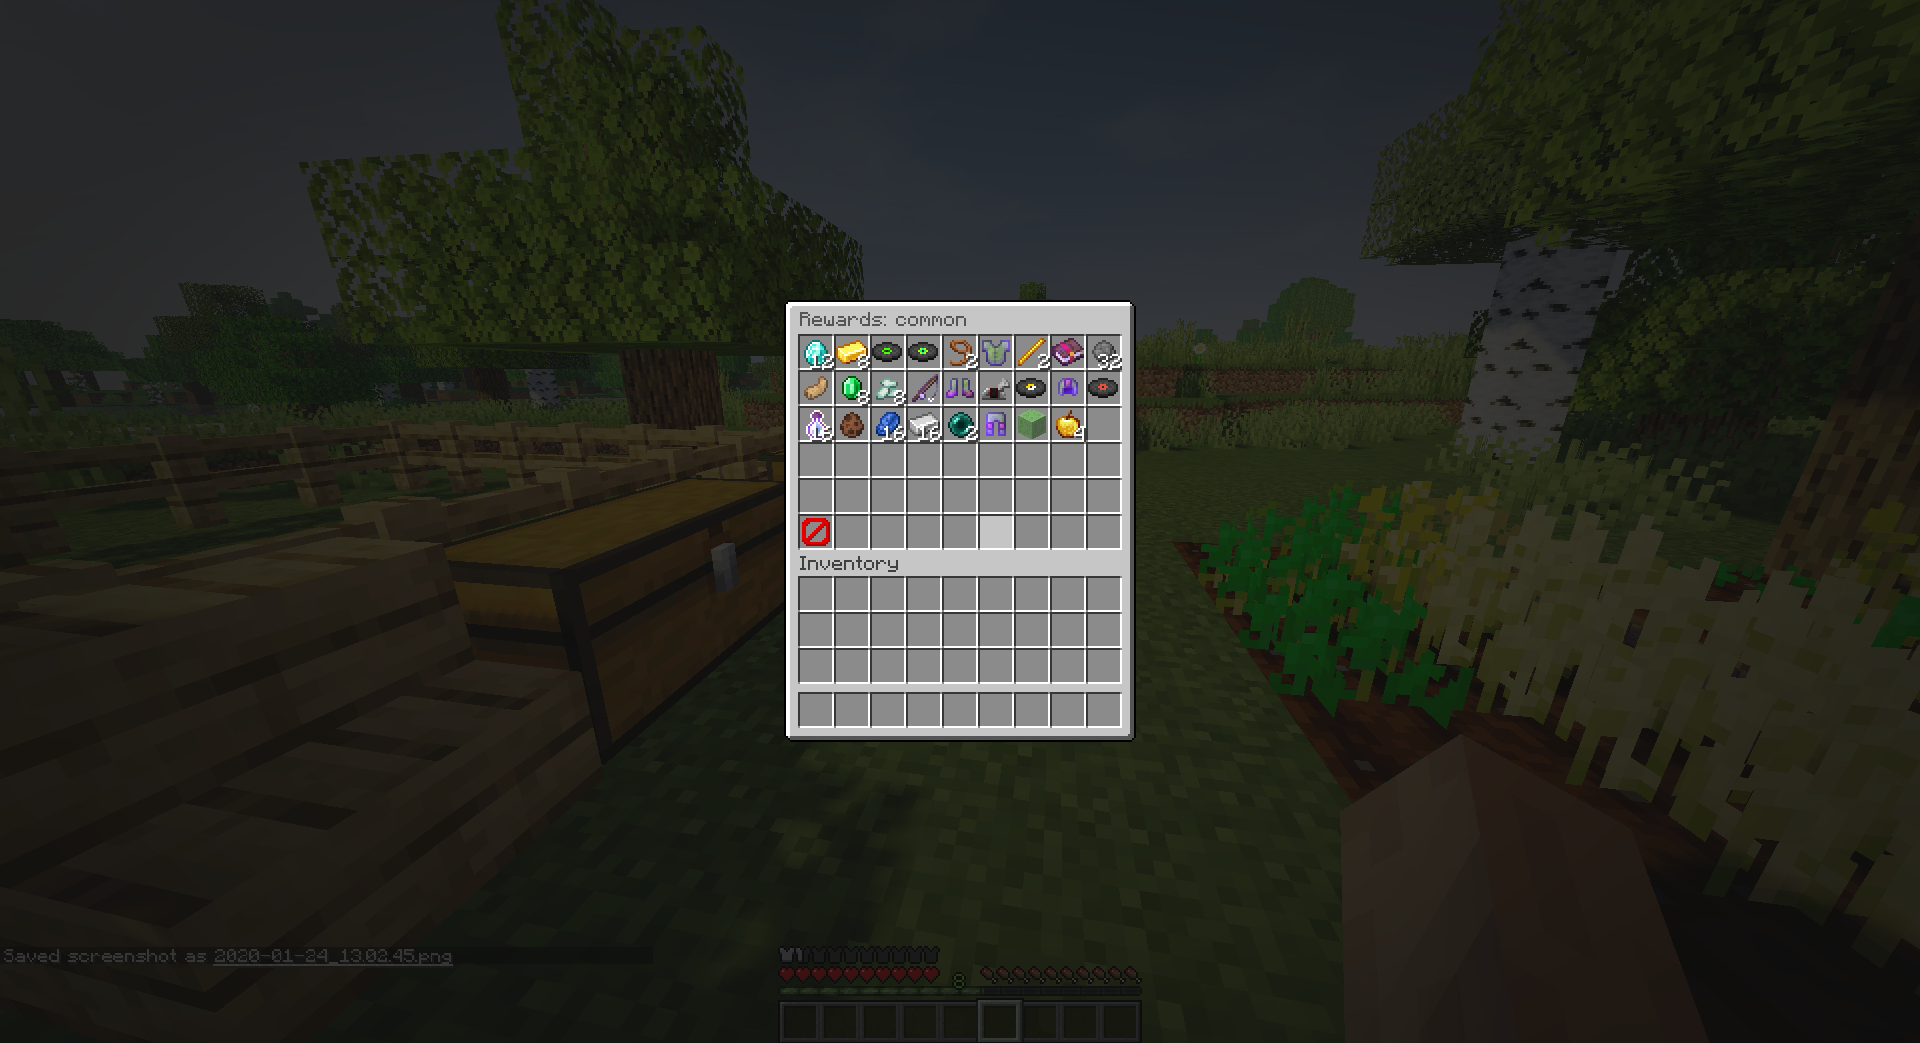
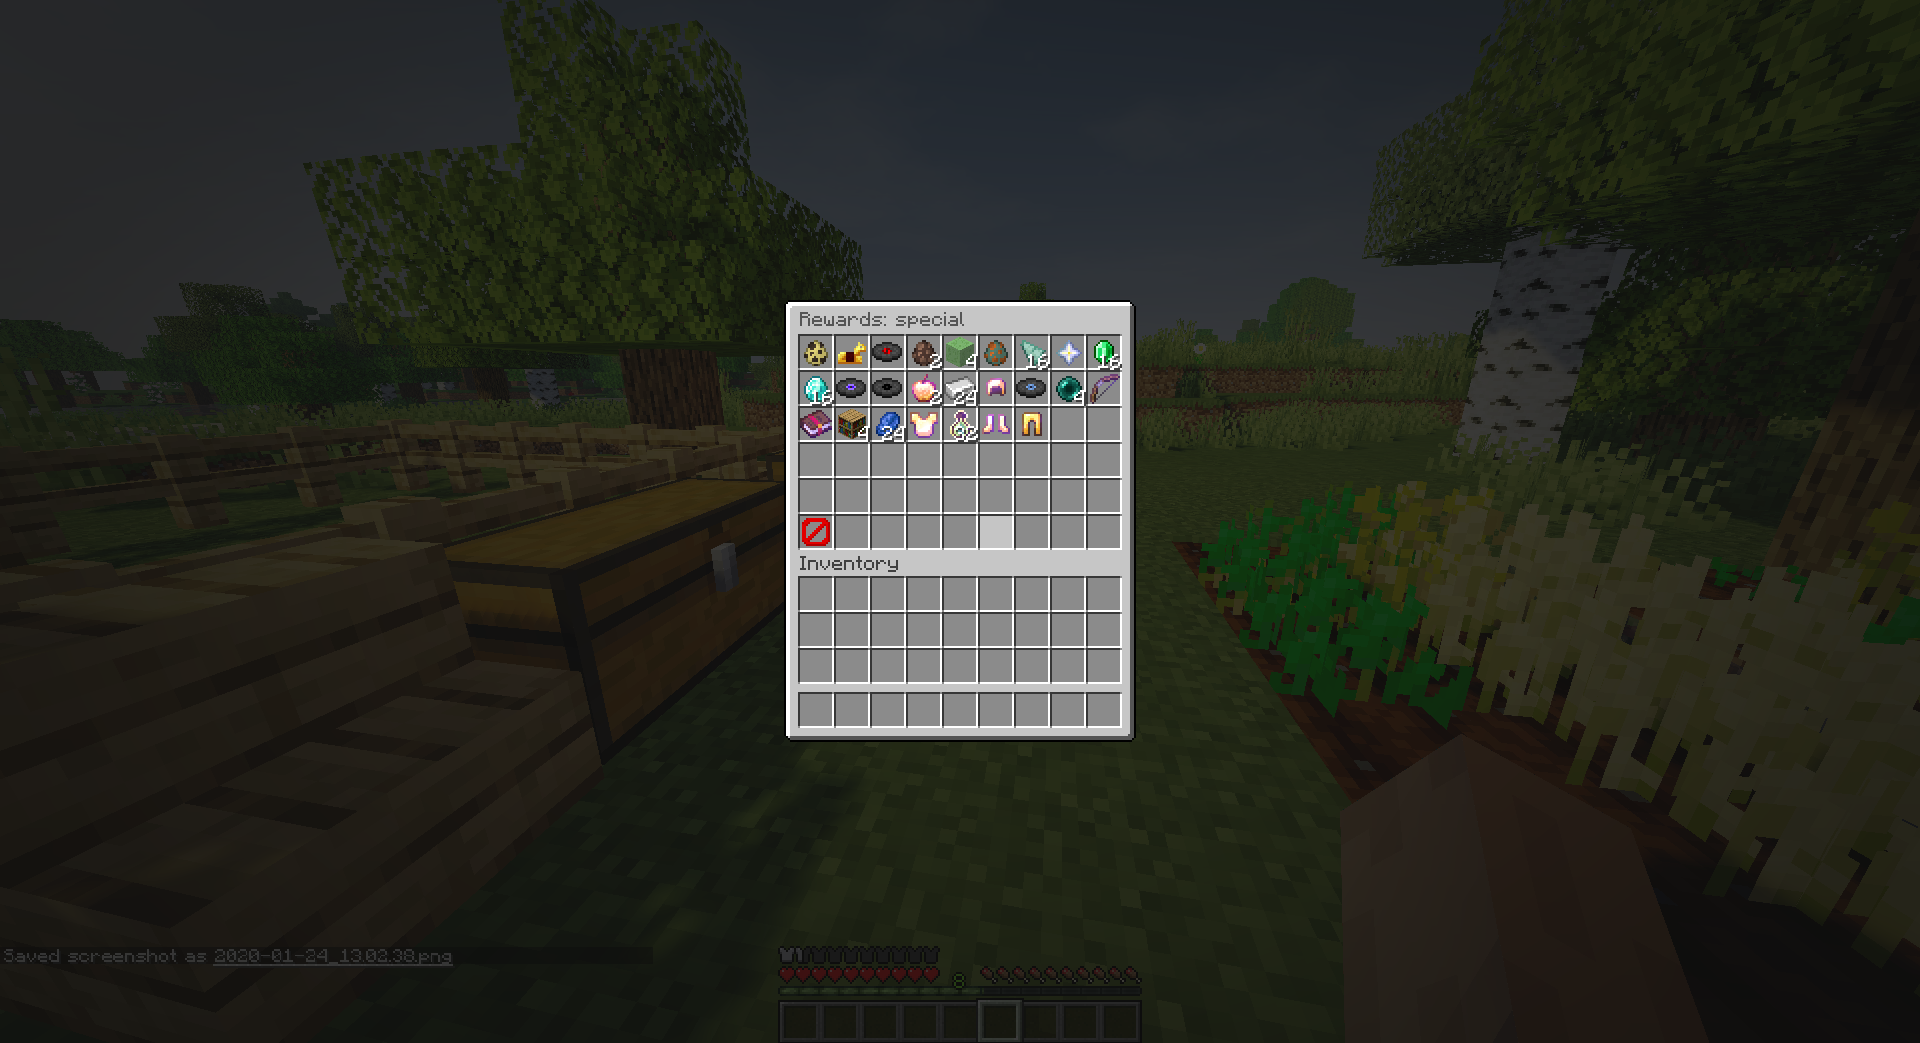
¶ Work-in-progress /cluescrolls editor
(Displaying the defaults clues + rewards)
¶ Editor menu viewing default tiers
¶ Viewing default legendary tier clues
¶ Viewing default common rewards
¶ Viewing default special rewards
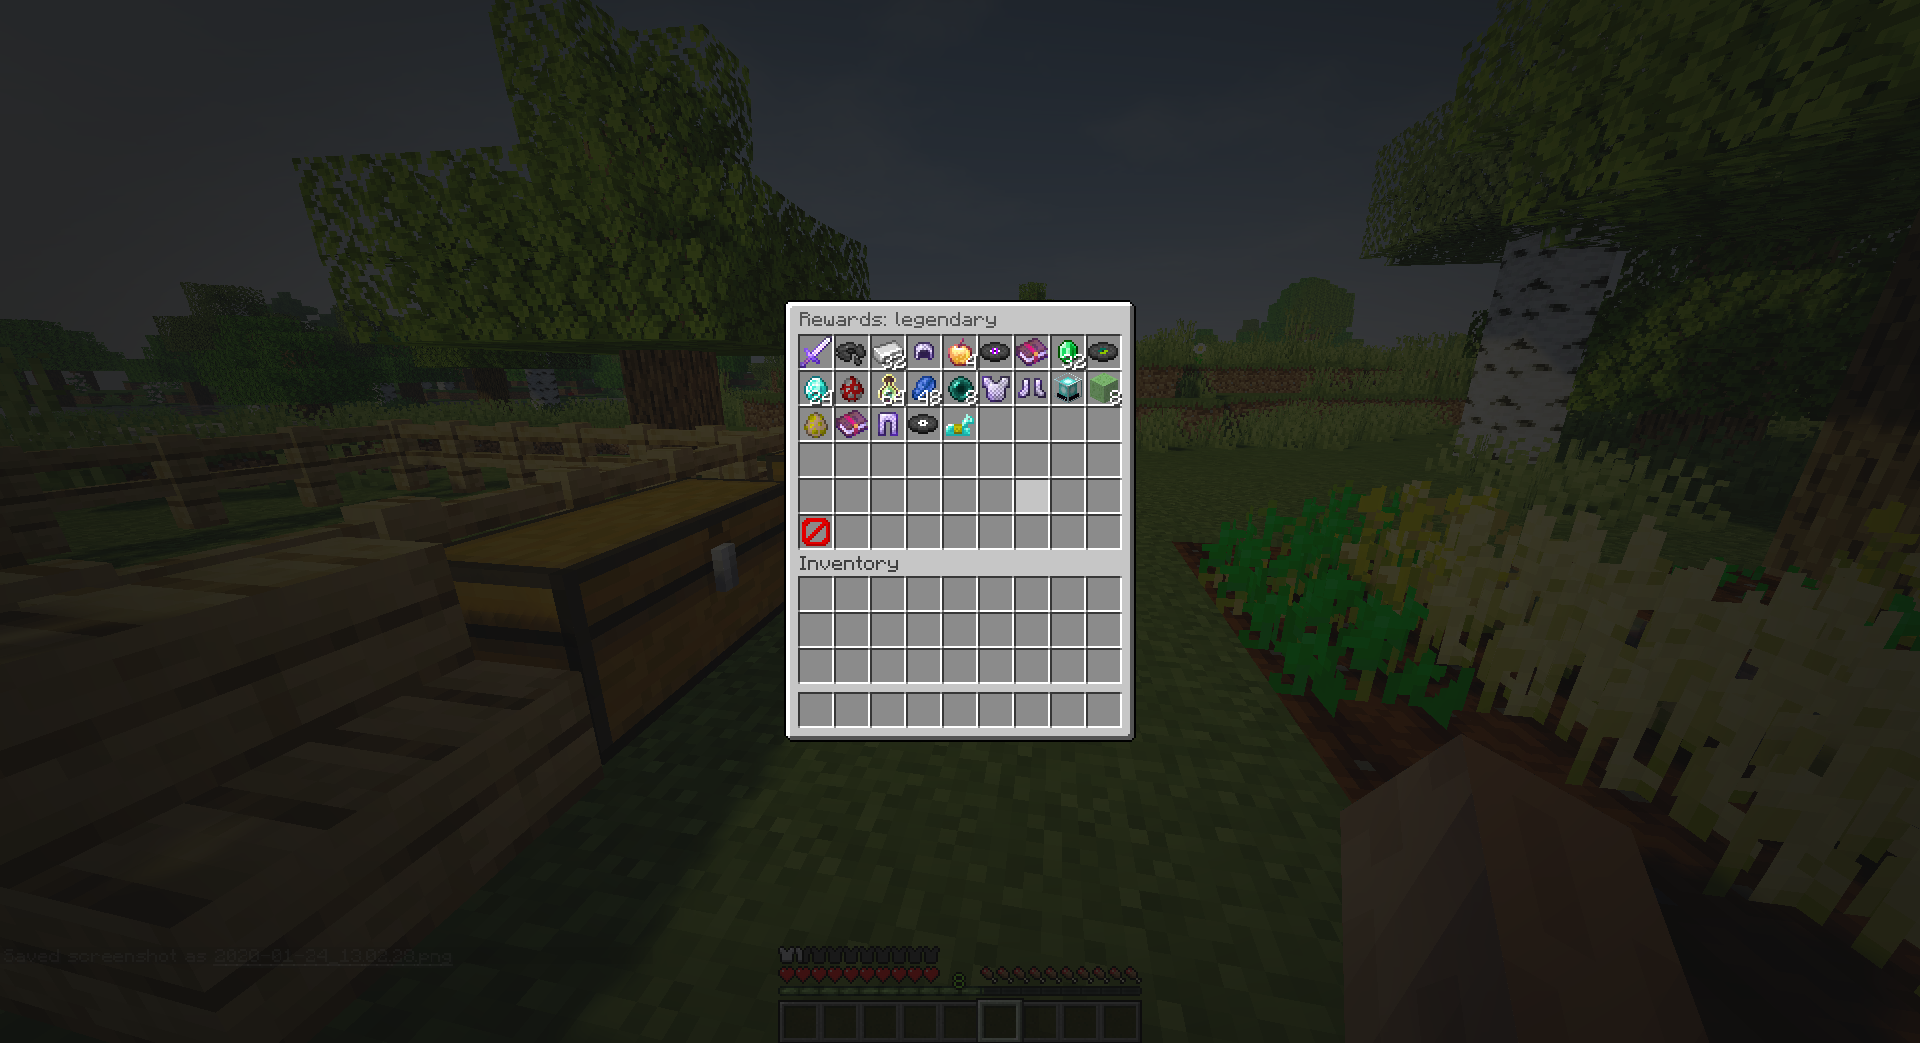
¶ Viewing default legendary rewards
¶ Tier Creation
Cluescrolls comes with three default tiers: commmon, special, and legendary.
Example:
tiers:
  #The three default tiers. Note that they must be in lowercase in order to work.
  #Under each tier are its options such as it's clues, clueCount, etc.
  common:
  special:
  legendary:
To create a new tier, simply copy a tier from your config and paste it in with a new tier name. All tiers are located under the tiers configuration section.
tiers:
  common:
  special:
  legendary:
  #To create this new tier I duplicated the entire section of another tier, such as legendary,
  #and then assigned it with a unique name of rare
  rare:
Now that you have copied a tier and all of its contents, you can configure it as normal and it will be available in game when the config is reloaded.
Tiers must be identified in all lowercase!
¶ Clue Creation
There's so much you can do with cluescrolls and the creation of your own custom clues that an entire page has been dedicated to explaining all the possibilites! ClueScrolls offers more than 70 clues - 25+ of them are internal minecraft clues such as
the craft clue or the kill clue, and the remaining 45+ are external clues that hook into plugins such as MythicMobs, Votifier, Boss, and more!
¶ Scroll Expiration
Tiers and mystery scrolls can define an expire rule. Once a scroll is expired it will prevent players from continuing the scroll. Optionally, expired scrolls may be removed automatically.
¶ Types
Supported expire type values:
- NONE - never expires
- DURATION (seconds) - expires after a certain amount of time provided in seconds
- DAILY - expires daily (end of day by default)
- WEEKLY - expires weekly (Sunday end of day by default)
- MONTHLY - expires monthly (Last day of month at the end of day)
- FIXED_AT (at) - expires at a specific epooch time
¶ Usage
Find the expire section in your tier or mystery scroll to configure.
¶ NONE
By default, the expire is set to none:
expire:
  type: NONE
¶ DURATION
Also specify how many seconds this scroll will be valid for. For example, 3600 seconds will yield 1 hour.
expire:
  type: DURATION
  seconds: 3600
¶ DAILY
The global default will cause DAILY expirations to expire at the end of day.
expire:
  type: DAILY
If you need to override the reset-time for this specific scroll, you may also provide the reset-time and timezone.
expire:
  type: DAILY
  timezone: America/New_York
  reset-time: "23:59:59"
¶ WEEKLY
The global default of Sunday will cause WEEKLY expirations to expire at the end of the day on Sundays.
expire:
  type: WEEKLY
If you need to override the day of week or reset-time, you may also provide the week-boundary, timezone, and reset-time. In this example, the scroll will expire on Monday at midnight.
expire:
  type: WEEKLY
  week-boundary: MONDAY
  reset-time: "23:59:59"
¶ MONTHLY
The global default will cause MONTHLY scrolls to expire on the last day of the month at the end of the day.
expire:
  type: MONTHLY
If you need this scroll to expire in the middle of the month, you may choose to specify monthly-day to override the global defaults
expire:
  type: MONTHLY
  monthly-day: 14
  reset-time: "23:59:59"
¶ FIXED_AT
FIXED_AT must also provide an at: setting with an ISO date, ISO-date-time, UTC, or numeric epoch value.
To expire at a specific date and time, it's easy to use an epoch calculator to get the exact numeric representation. Use this calculator and click the 'Human to timestamp' button to see the epoch number.

Using the epoch calculator, this tier will expire on January 27th, 20216 at 1:12:48 GMT.
expire:
  type: FIXED_AT
  at: 1769476368
This example, the tier will expire at midnight on January 28th, 2026.
expire:
  type: FIXED_AT
  at: "2026-01-28"
This example, the tier will expire at noon on January 28th, 2026.
expire:
  type: FIXED_AT
  at: "2026-01-28 11:59:59"
Other valid at formats include:
yyyy-MM-dd HH:mm:ss
yyyy-MM-dd HH:mm
yyyy-MM-dd'T'HH:mm:ss
yyy-MM-dd'T'HH:mm
# Local date-time with ISO 'T' separator (uses configured timezone)
at: "2026-01-28T18:30:00"
at: "2026-01-28T18:30"

# Offset date-time (timezone field is ignored, uses system/global default instead)
at: "2026-01-28T18:30:00-05:00"

# UTC instant
at: "2026-01-28T23:30:00Z"
¶ Global Defaults
The following defaults are provided to configure how reset times work:
# Defaults used for scroll and crystal expiration
expiration-defaults:
  # Use IANA time zone name such as 'America/New_York'
  # https://en.wikipedia.org/wiki/List_of_tz_database_time_zones
  timezone: SYSTEM
  # For WEEKLY: boundary day at reset-time
  week-boundary: SUNDAY
  # For MONTHLY: day-of-month at reset-time (31 automatically becomes the last day of month)
  monthly-day: 31
  # Default reset time used by DAILY/WEEKLY/MONTHLY expirations
  reset-time: "23:59:59"
¶ Adding Rewards
There's two types of rewards: item and command. To add rewards, use the following commands.
/cluescrolls additem [Tier] [Name] [Weight]
/cluescrolls addcommand [Tier] [Name] [Weight] [Command]
Adding an item adds the item in your main hand to the rewards for the given tier.
When adding a command, you can use %player% to represent the player's name.
The higher the weight (can be any number, even above 100), the higher the chance of it being given as a reward. It is recommended to use a base number such as 100 to represent general rewards for a tier. Then for rewards you want to be less common use a smaller number such as 25.
¶ Inventories
Inventory configuration is located in the config.yml under the inventory configuration section.
¶ Chest Inventory
The chest inventory is accessed by /cluescrolls chest.
The title of this inventory can be edited in the config.yml under the inventory.chest section.
Default chest inventory configuration:
inventory:
  chest:
    title: '&8◆ &n&lScroll Storage&r &8◆'
¶ Scroll Inventory
The scroll inventory is accessed by /cluescrolls shop, or /cluescrolls for regular users.
The configuration for this is located in your config.yml under the inventory.purchase section.
Default scroll inventory configuration:
inventory:
  purchase:
    title: '&8◆ &n&lClue Scrolls&r &8◆'
    size: 9
    items:
      '5':
        name: '%mystery_scroll_mystery_title%'
        lore:
        - '&7Click to unlock a &b&lMystery &7clue scroll'
        - ''
        - '&a&lCOST:&r&a %cost% &a&lXP'
        material: PAPER
        amount: 1
        hideAttributes: true
        purchaseAction:
          #scroll or crystal
          type: scroll
          #mystery or tier
          type-2: mystery
          #target name of item
          name: mystery
          currency: EXP
          amount: 1
          cost: 1000
          #permission: cluescrolls.tier.mystery
          cooldown:
            identifier: scroll_purchase
            time: -1
            message: '&cToo soon, you must wait %cooldown% before using this again.'
This inventory is fully customizable.
To create a larger inventory, modify the size: 9 to be a larger multiple of 9 such as 18 for a 2 row inventory, or 27 for a 3 row inventory.
The items section allows you to add additional scroll items for sale. The key is the slot ID the item will appear in. For example, 5 displays the item in the center of the first row.
¶ Purchase Action
Each item can have a purchase action. Items which do not specify a purchase action will still be displayed, but as a static item only to decorate the inventory. For example, you might add an item in the first slot with a lore that explains the inventory to users.
A purchase action requires a type and a type-2. These values correspond to those used in the /cluescrolls give command.
type: scroll or crystal
type-2: mystery or tier
name: The name field is the name of the scroll or mystery tier. Examples: common, legendary, or the name of a mystery tier such as mystery or exclusivemystery. The names are found in your config.yml under the tiers or mystery configuration sections.
¶ Currency Types
The currency type used by a purchase action can be one the following:
- EXP
- VAULT
- TOKEN_MANAGER
- PLAYER_POINTS
- POINTS_SHOP
- SOUL_POINTS
- PVP_POINTS
- POINTS_API
- POINTS_API_MINEHOME
- CYBER_LEVELS_EXP
- CYBER_LEVELS_LEVEL
¶ Cooldown
You can specify a cooldown for purchase actions. The cooldown time is specified in seconds.
The cooldown identifier is used to identify this cooldown. It can be unique to the purchase action, or shared with other purchase actions.
For example, if you allow players to purchase only one scroll every 12 hours but allow the user to choose the scroll you would use the same identifier label for all of these purchase actions.
¶ Rewards Inventory
Default rewards inventory configuration:
inventory:
  reward:
    title: '&8◆ &n&lRewards&r &8◆'
    size: 27
    randomly-place-items: true
    gui-enabled: true
If gui-enabled is set to false, rewards will automatically be placed into the player's inventory, or dropped at their location if inventory space is unavailable.
¶ Scrolls Chest
The scrolls chest is accessed by users with the /cluescrolls chest command.
This provides a way for players to complete scrolls without taking up inventory space in their player inventory. The scrolls chest only allows players to store scrolls and will prevent any other items from entering.
The size of the player's scroll chest is set by permission using the format cluescrolls.chestsize.[#] The number must be a multiple of 9: 9, 18, 27, 36, 45, or 54.
Scroll chests are stored to your SQL database configured in the database.yml. Note that switching from a local sqlite to MySQL server will cause players to lose their chests. If you are already using an sqlite database in production you should not change this.
¶ Mob Drops
ClueScrolls provides an interal way to config mob drops of scroll items.
Default mob drops configuration:
mob-scroll-drops:
  exampledrop:
    #0.5% chance of dropping when one of the following are killed
    chance: 0.5
    entity-types:
      - CREEPER
      - SKELETON
      - ZOMBIE
    #scroll or crystal
    type: scroll
    #mystery or tier
    type-2: mystery
    #target name of item
    name: mystery
    amount: 1
    #permission for this scroll drop. To skip permission remove permission line.
    permission: cluescrolls.mobdrop.exampledrop
Multiple mob drops can be created and can be controlled by permission. To make a mob drop available to all players, give your default permissions group access, or remove the permission from the mob drop.
¶ Message Configuration
Most messages are located in the messages.yml. Some messages that are specific to tiers are located directly inside the config.yml because they require unique color or contents.
Hex colors are supported. Use the format <#RRGGBB>
Messages are fully configurable and can trigger many actions besides static text.
A single message may be provided in-line, or a list may be provided if there are multiple messages and actions to execute.
Default clue-complete message:
clue-complete:
- '&a&l(!) &aYou have completed the &a&l%clueName%&r&a clue!'
- '<title>&a&lClue Completed<subtitle>&7%objective%'
For this example we are looking at the default clue-complete message seen in the messages.yml.
The first item in the list messages the player with a regular message.
The second item in the list sends a title message &a&lClue Completed with the subtitle &7%objective%.
¶ Message Action Types
In addition to regular chat messages, special actions can be executed by creating additional message lines and using the correct XML style notation.
The messaging system supports the following actions:
¶ Delay
The delay tag can be placed in-line before any message or other action type. It will execute the message action after the delay has passed. The delay must be provided in ticks. The server runs at 20 ticks per second, so a delay of 20 is equal to 1 second.
All other lines will execute immediately and independently of this delay action.
Example usage:
<delay=20>
This will delay execution of the following message action in the same line. In this example, nothing follows this delay so no addition actions take place.
Example usage:
<delay=20>After waiting a second, I'm now sending this message.
In this example, the message is executed after waiting 1 second.
¶ Command
The command tag is used to specify that a line is a command and should be executed by console.
Example usage:
<command>eco give %player% 100
When a message is sent, the eco give command was executed.
¶ Console
The console tag is used to send a message into the console. This is useful for debugging, or notifying the console of certain events.
Example usage:
<console>Hello, console!
¶ Sound
The sound tag is used to play a sound to the target player or players of a message.
Example usage:
<sound>BLOCK_ENCHANTMENT_TABLE_USE
<sound volume="0.6">ENTITY_VILLAGER_NO
<sound pitch="1.2">ENTITY_VILLAGER_NO
<sound volume="0.6" pitch="1.2">ENTITY_VILLAGER_NO
Sounds are provided by XSeries and are compatible across server versions.
¶ Firework
The firework tag is used to create fireworks at the player's location.
Example usage seen in default common tier completeMessage:
player:
  '- <firework power="127" detonate="20"><effect type="BURST" flicker="true" color="GREEN" fade="WHITE"/><effect type="BURST" flicker="true" color="#5cd60a" fade="WHITE"/></firework>'
A firework tag can provide the attributes power (default 127) and detonate (default 0).
power must be a number between 0 and 127
detonate is a number in ticks the delay before the firework explodes. A detonate value of 0 will immediately explode the firework when it is spawned. A detonate value of 20 will wait 1 second for the firework to fly upward before detonating.
A firework tag must contain firework effects inside of it. The firework can contain 1 or many effects.
Each firework effect can provide the following attributes, or a default value will be used:
color- default of WHITEfade- default of WHITEtype- default of BALLflicker- default of truetrail- default of true
The color and fade attributes are a color and can be any of the default color names provided by the server, or a custom HEX color.
Default Server Colors
Example Hex color: #FFFFFF
A single firework effect can have multiple colors shown. To do this provide a list of colors separated by a comma.
The type must be a firework effect type provided by the server: Firework Effect Types
Each firework effect tag must end with a \> tag.
A firework containing firework effects must end with a </firework> tag.
Example usage seen in the default legendary tier completeMessage:
player:
  - '<firework power="127" detonate="20"><effect type="BURST" flicker="true" color="GREEN" fade="WHITE"/><effect type="BURST" flicker="true" color="#5cd60a" fade="WHITE"/></firework>'
  - '<delay=20><firework power="127" detonate="20"><effect type="BALL" flicker="true" color="#ff24ba" fade="WHITE"/><effect type="STAR" flicker="true" color="#ff24ba" fade="WHITE"/></firework>'
  - '<delay=40><firework power="127" detonate="20"><effect type="BALL_LARGE" flicker="true" color="#f5d400,#fff199,ORANGE" fade="WHITE"/></firework>'
In this example multiple fireworks will be created and the <delay=#> tag is used on two of the fireworks.
This creates the effect of launching a firework every second and detonating them one second later.
¶ Title
The title tag is used to create a title bar message for the player.
Titles are displayed for the global duration specified in the title configuration section of the config.yml.
Example usage (title only):
<title>&a&lCongratulations
Example usage (with a subtitle):
<title>&a&lClue Completed<subtitle>&7%objective%
To display a title with a subtitle, both tags must be provided in the same line.
¶ Subtitle
The subtitle tag may be used alongside the title tag to display a subtitle with the main title message.
If the subtitle tag is used on its own message line, a subtitle only message will be sent to the player.
Example usage:
<subtitle>Small Message
In this message, the text Small Message will be displayed to the player.
¶ Action Bar
The actionbar tag is used to display an action bar message above the player's hotbar.
Example usage:
<actionbar>&e&nThis is an action bar message
¶ Boss Bar
The bossbar tag is used display a boss bar message to the player. Boss bars required server version 1.9+ to be used.
The bossbar must provide addition attributes inside its tag to function.
Example usage:
<bossbar color=green style=test length=20>Task Completed!
color must be one of the following: Bar Color
style must be one of the following: Bar Style
length is the time in ticks to display the boss bar
The text following the end of the tag is the message to display. Color codes are supported.
¶ Center
The center tag is used to message the player with a centered chat message. This will only work if the player is using the default chat setting configuration.
Example usage:
<center>&aCentered chat message
¶ Close Inventory
The close inventory tag is used to close the player's current inventory. This is useful for menus where a player cannot complete an action and you want their menu closed before displaying a chat or title message.
Example usage:
<closeinventory>
¶ Json
This tag is used to message the player with json formatted messages. These messages can suggest commands, run commands, open URLs, and display text on hover.
Not yet supported.
¶ PlaceholderAPI Placeholders
The following placeholders can be used in PlaceholderAPI
Create a leaderboard using ajLeaderboards
%cluescrolls_scrolls_completed% - Total count of all completed scrolls
%cluescrolls_scrolls_completed_[tier]% - Count of completed scrolls of given tier
%cluescrolls_clues_completed% - Total count of all completed clues
%cluescrolls_clues_completed_[clueType]% - Count of completed clues of given clue type
%cluescrolls_rewards_received% - Total count of all rewards received
%cluescrolls_rewards_received_[tier]% - Count of received rewards of given reward tier
¶ Database Configuration
ClueScrolls supports MySQL-compatible databases (such as MariaDB) as well as H2, a local internal database.
# +----------------------------------------------------+
# <         ClueScrolls Database Config File           >
# <               For MC versions 1.8.4+               >
# <    To reload your changes, /cluescrolls reload     >
# <                                                    >
# <     https://www.spigotmc.org/resources/30276/      >
# <  http://dev.electro2560.com/plugins/ClueScrolls/   >
# +----------------------------------------------------+

#Database configuration
database:
  #mysql or h2
  type: h2
  #prefix for all tables used by cluescrolls
  tables_prefix: 'cluescrolls_'
  #configure if using h2
  h2:
    file: database.db
  #configure if using mysql
  sql:
    hostname: 'localhost'
    port: '3306'
    dbname: 'mydb'
    username: root
    password: 'password'
# Do not edit this!
version: 4.5.2
¶ Test Servers
Not convinvced yet that ClueScrolls is right for you? Try it out on the official test server!
Official Test Server
demo.electro2560.com (Versions 1.8-1.15.2)
Current ClueScroll files on demo: download
¶ API
¶ Events
Tutorial coming soon for the two events and ClueScrollsAPI class. If you'd like to figure some things out yourself, the API docs can be found it. It should be fairly straight forward on how to use. https://docs.electro2560.com/cluescrolls/
¶ Custom clues
A ClueConfigData object represents a data key and it's value type as it would be used in the clue config. Ex:
To create custom clues, you must first create a CustomClue object. This contains a reference to your plugin, the clue name, and a varargs list of ClueConfigData objects.
CustomClue myClue = ClueScrollsAPI.getInstance().registerCustomClue(MyPlugin.get(), "myclue", clueConfigData...);
Example clue data pair:
ClueConfigData ccd = new ClueConfigData("customdata", DataType.MATERIAL);
Once your CustomClue is created, register it as a custom clue with ClueScrollsAPI.registerCustomClue(myClue);
Your clue will be registered as {plugin_name}_{clue_name}. In this case, it would be myplugin_myclue
To call for ClueScrolls to process a clue, call CustomClue#handle(Player player, ClueDataPair... clueDataPairs);
A ClueDataPair is an object like ClueConfigData, but containing a value that will be checked with the data of defined clues. Ex:
ClueDataPair cdp = new ClueDataPair("customdata", Material.STONE);
If a value will be null, a ClueDataPair for it does not need to be specified in the handle.
¶ Statistics
ClueScrolls collects usage data to assist the development. The data submitted by these services is completely anonymous.
bStats: https://bstats.org/plugin/bukkit/ClueScrolls (Since v1.6.6)
Metrics: http://mcstats.org/plugin/ClueScrolls/ (Added since first release)
¶ Terms & Conditions
- You are not allowed to resell this plugin
- You are not allowed to redistribute this plugin in anyway
- Nefarious chargebacks are forbidden and will result in a ban of your spigot account
- You may not use this on more than one server/network
- No refunds
- As the author, I am not required to provide updates
- Terms & Conditions may change at anytime without notice
- Support will only be offered to accounts which have purchased this resource
If there is an error, your best course of action is to send a PM on spigotmc or post a comment with the stack trace in the discussion of the plugin before leaving a review and it will be fixed asap.
If you have any ideas/features you would like to be added to the plugin, just send a PM or leave them on the discussion page of the plugin.